Stamped Tea Towels: Printing a Simple Pattern by Hand
Print a plain cotton or linen tea towel with fabric paint and a stamp cut from a potato, a cork or craft foam, using folded creases to keep the pattern evenly spaced.
Tutorial at a glance
Materials
- Plain pre-washed cotton or linen tea towel
- Fabric paint in one or two colors
- Firm potato, cork, or craft foam and a small wooden block
- Foam brush and a flat dish
- Kitchen knife and cutting board, or scissors and craft glue
- Scrap cotton for test prints
- Cardboard or paper to protect the table
- Iron
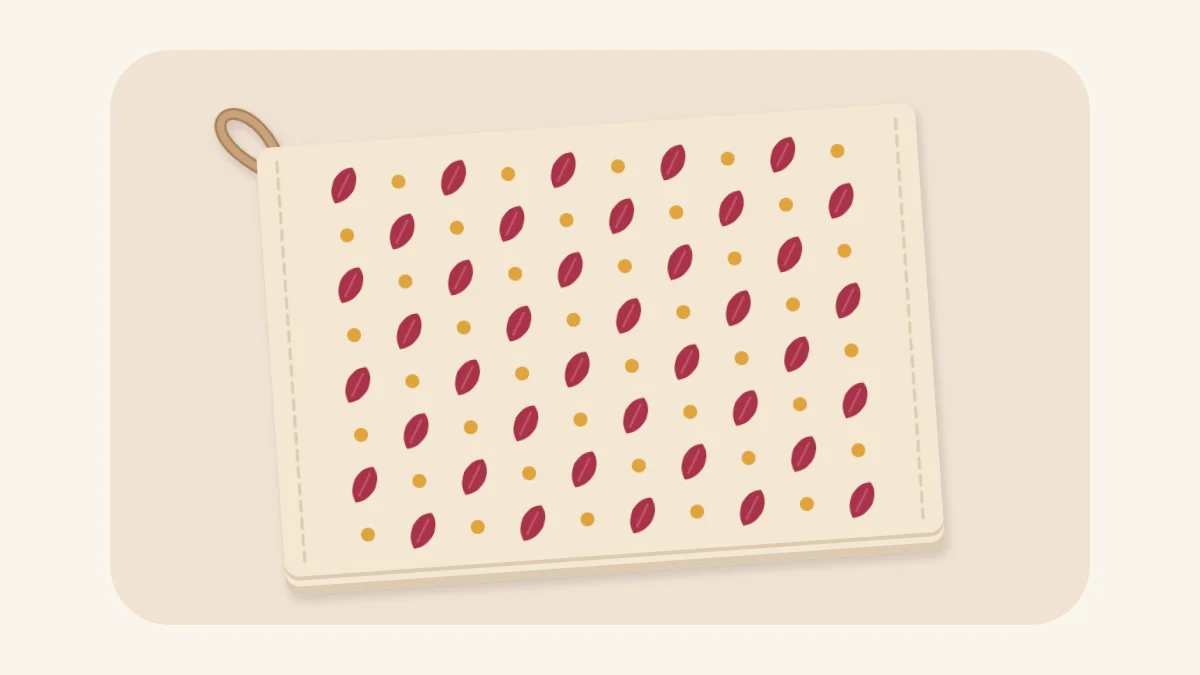
Stamped tea towels are plain cotton or linen towels printed by hand with fabric paint and a stamp you can make from a potato, a cork or a piece of craft foam. The printing itself is a press-and-lift motion, so the project suits a beginner who has never sewn a stitch. What decides how the towel looks is the preparation: a washed towel, a test print and a plan for where each print goes.
Slight differences in paint coverage are part of how hand printing looks, so aim for even spacing rather than identical prints.
What You Need
- A plain cotton or linen tea towel, about 18 x 28 in (45 x 70 cm), in a light color
- Fabric paint in one or two colors
- Something to stamp with: a firm potato, a cork, or craft foam and a small wooden block
- A foam brush and a flat dish or plate for the paint
- A sharp kitchen knife and a cutting board, or scissors and craft glue for a foam stamp
- Scrap cotton for test prints, such as an old pillowcase
- Cardboard or paper to protect the table, and an iron
Fabric paints differ in how they are set and laundered, so read the label before you start. The basic supply list for paper and fabric projects covers the brushes, scissors and glue used here.
Prepare the Towel
Wash and dry the towel before printing, following its care label, and skip fabric softener. New towels often carry a finish that keeps paint from soaking into the fibers, and cotton and linen can shrink in the first wash. Printing first and washing later risks a puckered or patchy pattern.
Press the towel flat. Paint will not reach the bottom of a wrinkle, and the gap shows as a pale line through the print. Lay the towel on cardboard or paper, since paint can pass through a thin weave and mark the table underneath.
Three Stamps You Can Make
Each of these stamps prints one simple shape. Keep the shape bold: thin lines and small details fill with paint and blur on woven fabric.
| Stamp | How to make it | Prints | Good to know |
|---|---|---|---|
| Carved potato | Halve a firm potato, draw a leaf on the cut face and cut away the potato around it to about 1/4 in (6 mm) deep | A leaf or other solid shape | Blot the cut face first; a wet surface thins the paint. Make it on the day you print. |
| Cork | Use the flat end as it is | A round dot | A chipped cork prints a broken circle. |
| Foam on a block | Cut a triangle from craft foam and glue it to a small wooden block; let the glue set as its label directs | A crisp triangle | Can be rinsed and reused, and the block works as a handle. |
Cut the potato on a board with the blade moving away from your hand. If the cut face is not level, slice a thin layer off and carve again, because an uneven face prints only on its high side.

Test on Scrap First
Pour a little paint into the dish and brush a thin, even coat onto the stamp with the foam brush. A dipped stamp picks up a ridge of paint at its edges that squashes out into a blurred outline.
Press the stamp straight down on the scrap fabric with firm, even pressure, and lift straight up without rocking it. Make several prints and compare them:
- Pale or patchy print: too little paint or too little pressure.
- Blurred edge or a filled-in center: too much paint.
- Doubled outline: the stamp moved while it was down.
Reload the stamp before every print so the pattern does not fade across the towel.
Space the Prints with a Crease Grid
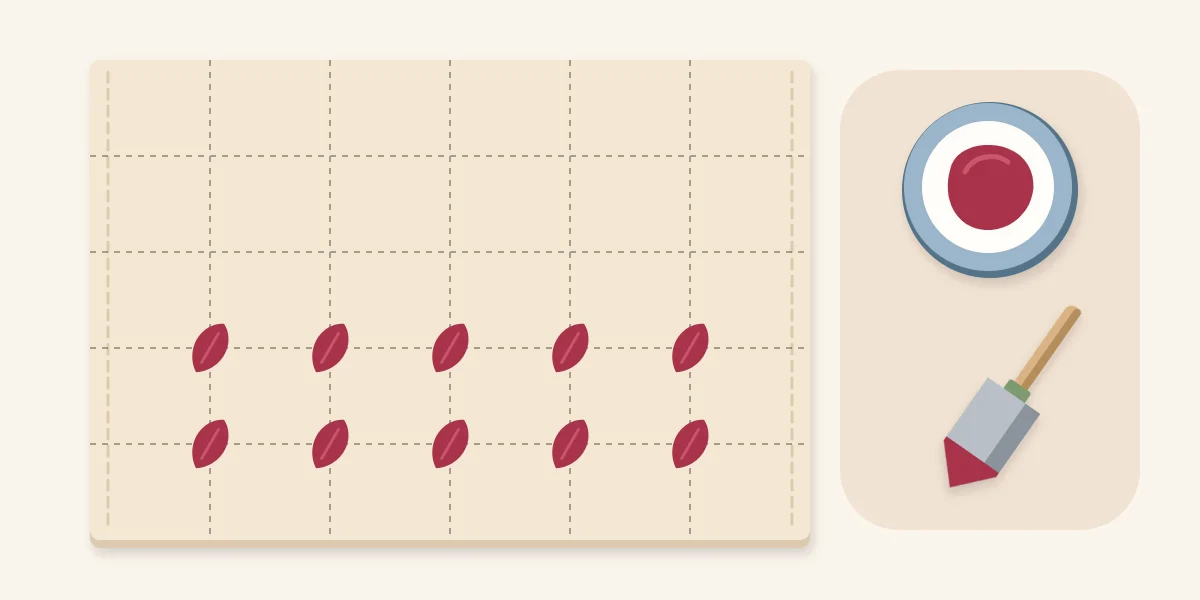
Folding the towel gives you guide lines without drawing on the fabric. Fold the towel in half lengthwise and press the fold with your fingers or the iron, then fold it in half again the same way and press. Open it out: you have three lengthwise creases. Repeat across the width to make the crosswise creases.
The creases form a faint grid, and each crossing is the center of one print. Start at the hem nearest you and work one row at a time away from yourself so your hand never passes over wet paint. Line up the middle of the stamp with a crossing, press, lift and move on.
Tip
Mark the top of a potato or foam stamp with a pen on the back so the leaf points the same way in every print.
Border or all-over layout
A border uses only the crossings nearest one short hem, in one or two rows. It needs fewer prints and stays visible when the towel hangs folded over a rail, which makes it the safer choice for a first towel.
An all-over layout puts a print on every crossing. To add a second color, print the first motif everywhere, then stamp a cork dot in the middle of each grid square, halfway between four leaves. Use a separate brush for each color.
Setting the Paint
Leave the towel flat until the paint is fully dry. Many fabric paints then need to be set, often with an iron, before the fabric is washed. Products differ in method and in how long to wait, so follow your paint’s label, and use an iron only as the towel’s care label allows.
If Something Goes Wrong
- A smudge or a drip: wet fabric paint rarely lifts out cleanly, and rubbing spreads it. Print over it, or turn the mistake into an extra dot or leaf that fits the pattern.
- Rows drifting off line: the creases have relaxed. Refold and press them again before continuing.
- Prints getting weaker: a potato softens with use. Slice off the face and recarve, or switch to the foam stamp.
Giving the Towels
Fold the finished towel in thirds lengthwise so the printed area faces out and tie it with twine. A towel pairs well with a set of sewn fabric coasters in matching colors. Add a note saying the towel is hand printed with fabric paint and how to launder it, copied from the paint label. The guide to wrapping a handmade gift and writing a care note has wording you can adapt.
The same paint, test prints and thin coats carry over to stenciling an initial on a canvas tote.
Frequently asked questions
Can ordinary acrylic craft paint be used instead of fabric paint?
Paint made for fabric is the better choice because it is formulated to stay flexible on cloth. Some craft paints can be mixed with a fabric medium, but results depend on the product. Read the label of whatever you use and test it on a scrap of similar fabric before printing the towel.
Do the crease lines stay in the towel after printing?
The creases are only pressed folds, so they come out when the towel is pressed flat again or laundered. If the paint needs to be set with an iron, follow the paint label, and the fold lines are usually pressed out at the same stage.
Which stamp is easiest for a first towel?
A cork is the simplest because it needs no cutting and prints a clean dot. A foam shape glued to a block comes next, since it is cut with scissors and can be reused. A carved potato allows curved shapes such as leaves but needs a level cut face and has to be made on the day you print.