Stenciled Monogram Tote Bag: Personalize a Plain Canvas Tote
Cut a bold initial from freezer paper or cardstock, centre it on a pre-washed canvas tote and dab fabric paint through it in thin layers for a crisp monogram.

Tutorial at a glance
Materials
- Plain cotton canvas tote bag, pre-washed and pressed
- Fabric paint in one color
- Freezer paper or cardstock for the stencil
- Craft knife and cutting mat, or small sharp scissors
- Round sponge dauber or stencil brush
- Cardboard to fit inside the bag
- Masking tape, ruler and pencil
- Paint dish and paper towels
A stenciled monogram tote bag needs only a blank canvas tote, a paper stencil and a small amount of fabric paint. The technique is dabbing rather than brushing: paint goes on in thin layers through a cut-out shape, which gives a crisp edge even on coarse canvas.
A single bold initial or a simple shape works best. Fine lines and small enclosed details are hard to cut and tend to blur on a textured weave, so keep the design chunky, at least 3 in (7.5 cm) tall, and leave the delicate lettering for paper projects.
What You Need
- A plain cotton canvas tote bag in a light color
- Fabric paint in one color
- Freezer paper or cardstock for the stencil
- A craft knife and cutting mat, or small sharp scissors
- A round sponge dauber, a piece of cosmetic sponge or a stiff stencil brush
- A piece of cardboard that fits inside the bag
- Masking tape, ruler, pencil, a paint dish and paper towels
- An iron, if your stencil material or paint label calls for one
Wash, dry and press the tote before you start, following its care label. New canvas is often treated with a finish that stops paint from soaking into the fibers, and it can shrink in the first wash. A crease under the stencil leaves a gap where paint creeps out.
Freezer Paper or Cardstock: Choosing a Stencil
| Stencil material | How it is held down | Edge quality | Reusable |
|---|---|---|---|
| Freezer paper | Shiny side pressed to the fabric with an iron so it clings lightly; follow the fabric’s care label for the iron setting | Sharp, because the paper sits tight to the weave | Usually one use |
| Cardstock | Masking tape on all four sides, plus a finger holding the edge you are painting | Good, if paint is kept very dry | Several uses if wiped and left to dry |
For either material, draw or trace the initial onto the paper and cut it out so that the letter is the hole. Leave a border of at least 2 in (5 cm) of paper around the design to protect the canvas from stray dabs.
Letters with enclosed spaces, such as A, B, D, O, P, Q and R, have a centre piece that falls out when you cut. With freezer paper, save that piece and iron it back in position. With cardstock, leave two narrow bridges connecting the centre to the rest of the stencil, or choose a letter style that is open at those points.
Watch out
Check the initial before cutting, and check that the stencil reads the right way round when it is lying on the bag. A letter traced on the back of the paper comes out mirrored. Paint on canvas cannot be removed once it has soaked in.
Protect the Back and Centre the Stencil
- Slide the cardboard inside the tote so it lies flat between the front and the back. Fabric paint passes through a single layer of canvas, and without a barrier it prints a ghost of the design on the other side.
- Lay the bag flat with the front up and smooth it over the cardboard. Tuck the handles out of the way.
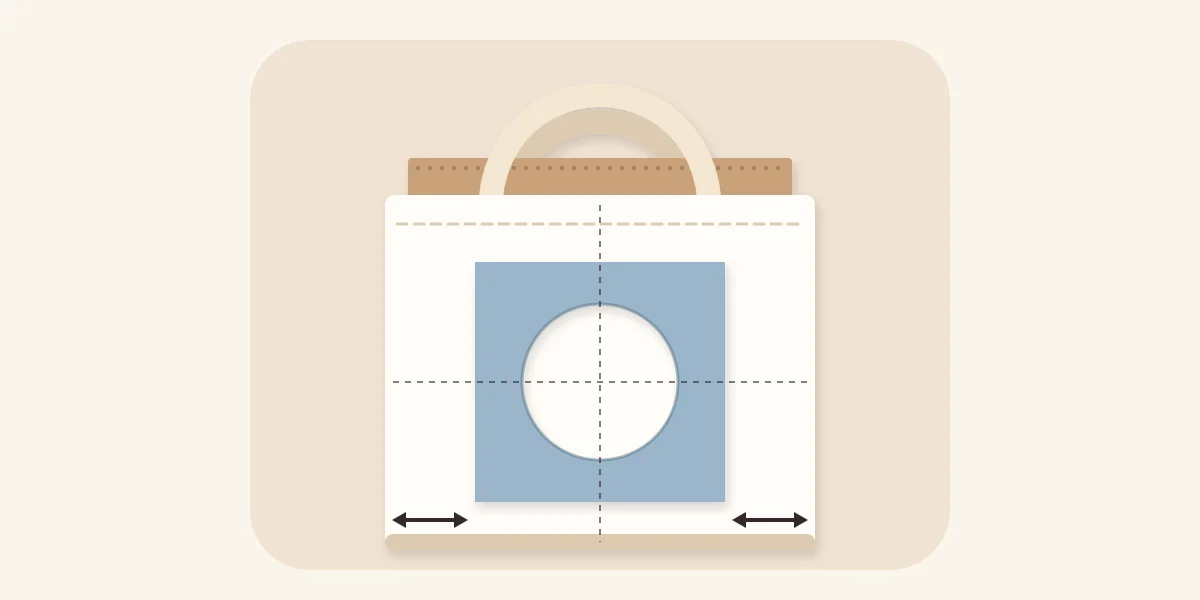
- Find the centre. Measure the width between the two side seams and mark the halfway point lightly in pencil near the top and near the bottom. Do the same for the height, measuring from the top hem to the bottom fold. Placing the design slightly above the true centre keeps it visible when the bag is full.
- Fold the stencil in half both ways and pinch the edges to mark its own centre lines, then line those up with the pencil marks on the bag.
- Fix the stencil: iron freezer paper down shiny side to the fabric, or tape cardstock on all four sides. Run a fingertip around the cut edge to confirm it is lying flat everywhere.
Dab the Paint in Thin Layers
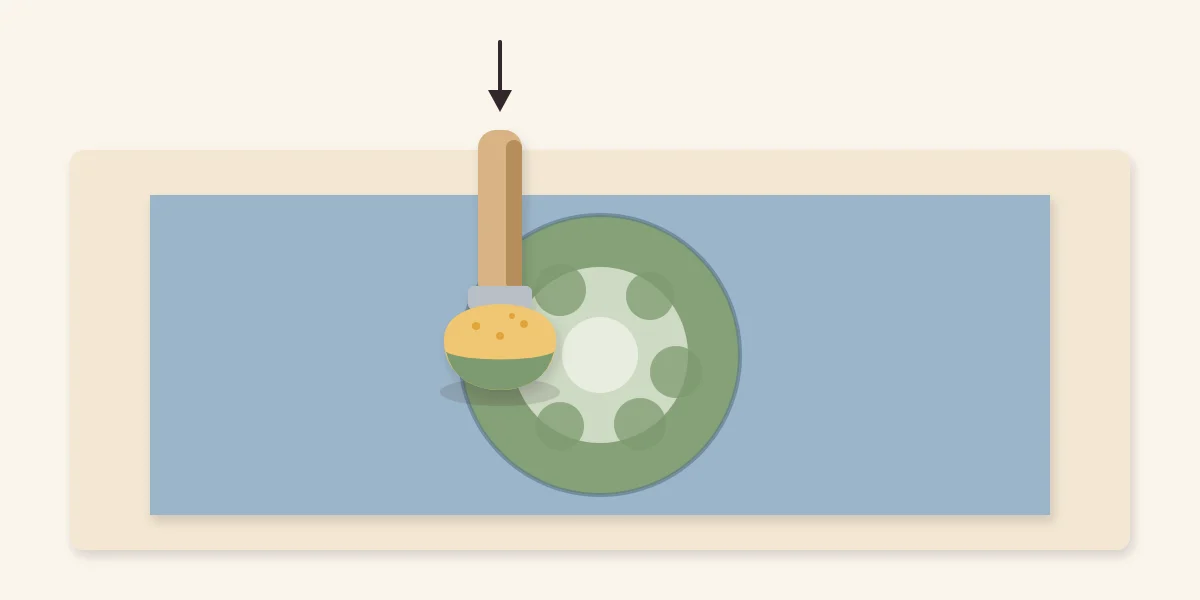
- Pour a small amount of fabric paint into the dish. Touch the dauber to it, then blot most of the paint off on a paper towel. The sponge should look almost dry.
- Test on a scrap of similar fabric or inside the bag’s hem.
- Start at the edges of the stencil opening. Press the dauber straight down and lift it straight up, working around the outline first. A sideways brushing motion pushes paint under the paper; an up-and-down motion does not.
- Move inward to fill the middle. The first layer will look patchy, with the weave showing through, and that is expected.
- Let the first layer become touch-dry as the paint label describes, then add a second thin layer the same way, edges first. Thin layers cover more evenly than one heavy coat, which is what causes blurred edges and a stiff patch.
- Lift the stencil while the last layer is still slightly damp, peeling slowly from one corner and pulling straight up and away from the paint.
Tip
Reload the dauber often with very little paint instead of loading it heavily once. If a dab leaves a wet, shiny blob, there is too much paint on the sponge; blot it again before touching the stencil edge.
Setting the Paint
Leave the cardboard inside and the bag flat until the paint is dry. Fabric paints differ in how they are made permanent: some need pressing with an iron through a cloth, some set by air alone, and each has its own waiting period before the first wash. The paint’s label is the only reliable source for those steps, so keep it and follow it exactly.
If Something Goes Wrong
- Paint bled under the edge. Use a fine brush and the same paint to straighten the outline, thickening the letter slightly all around so the correction looks intended.
- Coverage is patchy after lifting the stencil. Lay the stencil back exactly over the shape, tape it, and dab another thin layer.
- A stray dab landed outside the design. Turn it into a deliberate detail; a small dot repeated two or three times looks planned.
Giving It
A tote can act as its own wrapping. Fold it in thirds with the monogram facing out, tie it with twine, and attach one of your own personalized gift tags. It can also hold other items, such as a set of stamped tea towels made with the same fabric paint, or a hand-embroidered monogram handkerchief carrying the same initial.
Copy the washing instructions from the paint’s label onto a small care note. The guide on how to wrap a handmade gift has wording for care notes.
Frequently asked questions
Why put cardboard inside a tote bag before stenciling?
Fabric paint can pass through one layer of canvas and mark the layer behind it. A piece of cardboard between the front and back of the bag catches that paint. It also gives a firm, flat surface to press against, which helps keep the stencil edge tight.
How do you stop fabric paint from bleeding under a stencil?
Use very little paint and dab straight up and down instead of brushing sideways. Blot the sponge on a paper towel until it is nearly dry, start at the edges of the opening and build coverage in two or three thin layers. Make sure the stencil lies flat against pressed fabric before you begin.
Does the tote need to be washed before painting?
Yes. New canvas often carries a finish that keeps paint from soaking into the fibers, and it may shrink the first time it is washed. Wash, dry and press the bag according to its care label, then stencil. For washing after painting, follow the fabric paint's own label.