Felt Christmas Ornaments: Stars, Trees, and Mittens to Sew by Hand
Three two-layer felt ornaments, a star, a tree and a mitten, decorated on the front, joined with blanket stitch and lightly stuffed.
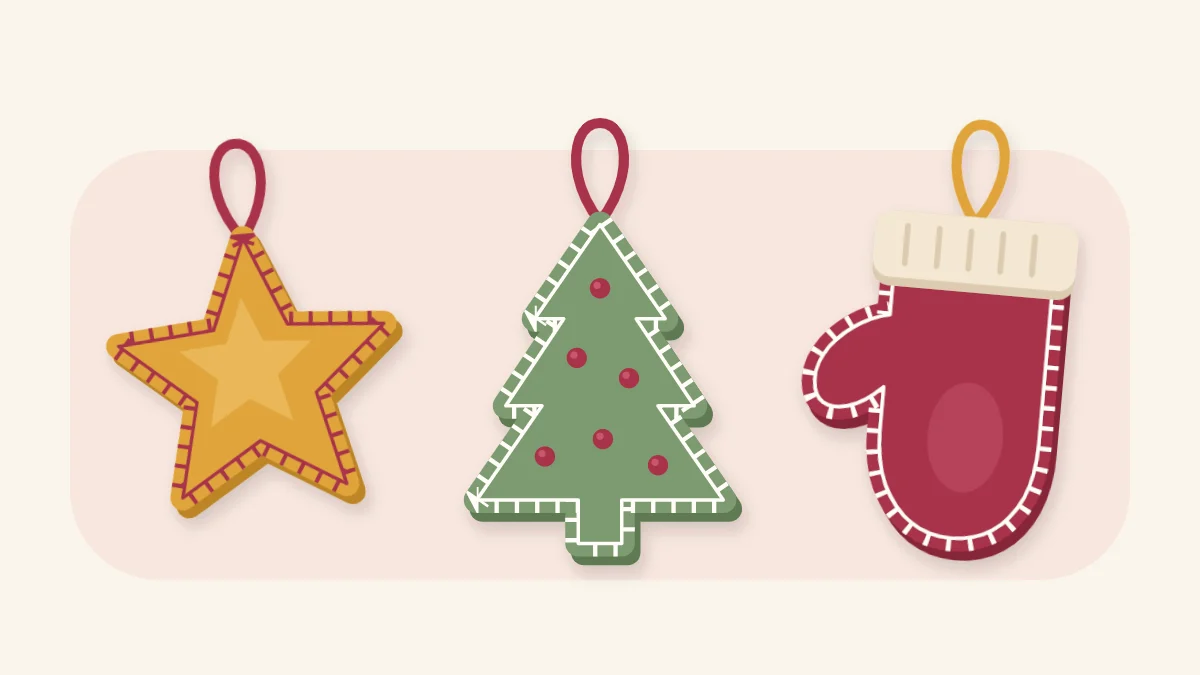
Tutorial at a glance
Materials
- Craft felt in three or four colors
- Paper and pencil for templates
- Small sharp scissors
- Pins
- Six-strand embroidery floss
- Embroidery needle
- Narrow ribbon, about 6 in (15 cm) per ornament
- Polyester fiberfill or felt offcuts
- Optional sequins or small buttons
These felt Christmas ornaments are three simple shapes, a star, a tree and a mitten, each made from two layers of craft felt joined with blanket stitch and lightly stuffed. A set of three packs flat into a small box and suits anyone who puts up a tree, hangs decorations on a garland or ties ornaments onto wrapped parcels.
The order of work matters more than the stitching itself. Decoration goes on the front piece before the two layers are joined, because once the ornament is closed there is no way to hide knots on the inside.
What You Need
- Craft felt in three or four colors, for example mustard, green, red and cream
- Paper, a pencil and paper scissors for the templates
- Small sharp scissors for the felt, and pins
- Six-strand embroidery floss and a needle with an eye large enough for it
- Narrow ribbon, about 6 in (15 cm) per ornament
- Polyester fiberfill or felt offcuts for stuffing
- Optional: sequins, small buttons or scraps of felt for appliqué
Templates and Cutting Pairs
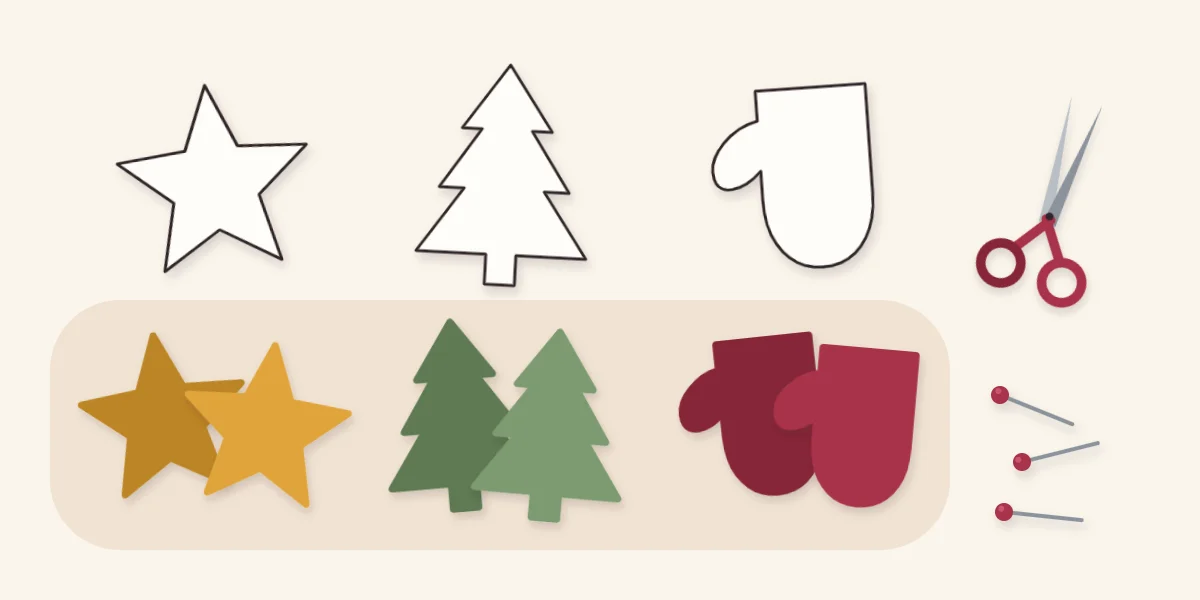
Draw each template on paper about 3 1/2 in (9 cm) tall. Simple outlines with wide curves are easier to blanket stitch than fine detail.
| Shape | How to draw it | Suggested size |
|---|---|---|
| Star | Five points with blunt, slightly rounded tips and wide inner angles | 3 1/2 in (9 cm) across |
| Tree | A tall triangle with three shallow steps down each side and a short square trunk; fold the paper in half lengthwise to keep it symmetrical | 3 1/2 in (9 cm) tall, 2 3/4 in (7 cm) wide |
| Mitten | A rounded hand shape with a short thumb at one side and a straight cuff edge at the bottom | 3 1/2 in (9 cm) tall, 2 1/2 in (6.5 cm) wide |
Pin each template to a double layer of felt and cut through both layers at once, so the front and back match exactly. The mitten is the one shape that is not symmetrical. Cutting it through two layers gives a mirrored pair automatically, which is what you want. For a cuff, cut a strip of cream felt the width of the mitten and about 3/4 in (2 cm) deep.
Decorating, Stitching, and Stuffing
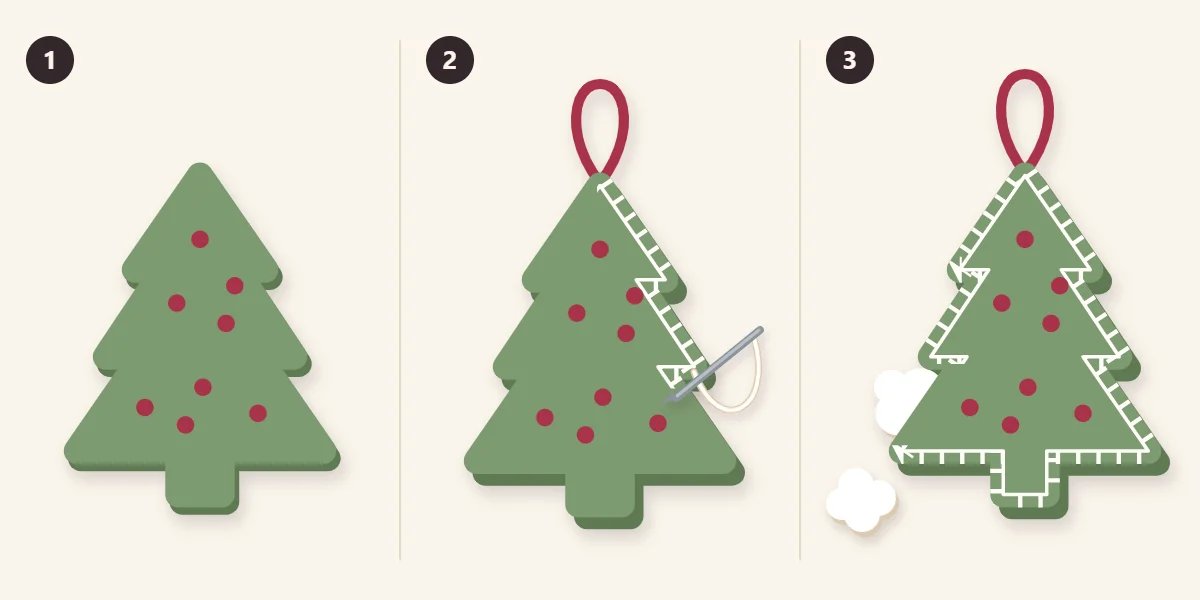
Use two strands of floss for decoration and three for the edge. The steps describe the tree, and the star and mitten follow the same order. If blanket stitch is unfamiliar, practice it on a scrap with the guide to four hand-sewing stitches first.
- Decorate the front. Take one tree piece and scatter small stitched dots across it: tiny straight stitches, each no longer than 1/8 in (3 mm), worked at different angles like falling snow. This is often called seed stitch. Keep all decoration at least 1/4 in (6 mm) inside the edge, clear of where the blanket stitch will go, and fasten off on the back.
- Join front and back with the ribbon loop. Fold the ribbon in half and lay its two cut ends about 1/2 in (1.2 cm) down inside the top point of the back piece. Place the front on top with the decoration facing out, and pin. Start the blanket stitch on one side, hiding the knot between the layers, and work around the shape with stitches about 1/8 in (3 mm) deep and the same distance apart. At the top, pass the needle through both felt layers and the ribbon ends so the loop is anchored by several stitches.
- Stuff and close. Stop when a gap of about 1 1/4 in (3 cm) remains on a straight section. Push in small tufts of stuffing with the blunt end of a pencil, reaching the points first. Then continue the blanket stitch across the gap, join it to the first stitch and fasten off between the layers.
Tip
Stuff lightly. The ornament should be gently domed, not round. Overfilling stretches the blanket stitch into open loops and makes the points twist.
Ideas for the Star and the Mitten
For the star, sew one sequin or small button in the centre of the front, or work a smaller star outline in running stitch about 1/4 in (6 mm) inside the edge. At inner angles, take one extra blanket stitch right in the corner so the thread turns cleanly.
For the mitten, attach the cuff strip to the front piece with small whipstitches along its upper edge before joining the layers. The lower edge of the cuff is then caught in the blanket stitch along the bottom. Put the ribbon loop at the cuff corner opposite the thumb so the mitten hangs at a slight angle, or at the centre of the cuff so it hangs upside down like a mitten on a line.
The construction is the same as for a stuffed felt keychain, only larger and with a ribbon loop in place of a split ring.
Common Problems
- The front and back do not line up. The pieces shifted. Pin through both layers in the centre and trim any overhang with small scissors before stitching.
- Stitches crowd together on curves and points. Fan them: keep the spacing even along the edge and let the legs angle toward the centre.
- The ribbon loop pulls out. It was caught by only one stitch. Unpick the top, set the ends deeper and stitch through them two or three times.
- Lumpy stuffing. Large wads were pushed in at once. Tease the stuffing into small tufts and add them one by one.
- Floss runs out partway around. Fasten off between the layers and start a new length by coming up through the loop of the last stitch.
Giving a Set of Three
Lay the three ornaments side by side in a shallow box lined with tissue paper, with the ribbon loops folded onto the fronts so they do not crease. A small card can name the materials: felt, polyester stuffing, and any buttons or sequins. The guide to wrapping a handmade gift covers boxes, tags and care notes.
Watch out
These ornaments are decorations, not toys. Sequins, buttons and ribbon loops are small parts, so hang them out of reach of young children and pets. Keep felt away from candles and from bulbs that get hot.
The same two-layer method, left open at the top instead of stuffed, makes a felt heart pocket for later in the winter.
Frequently asked questions
Why decorate the front before sewing the layers together?
Once the two layers are joined, every knot and thread tail from the decoration would have to sit on the outside or be pulled through the back. Decorating the single front piece first lets you fasten off on its wrong side, and the back layer then covers everything.
What can felt ornaments be stuffed with?
Polyester fiberfill is the usual choice because it teases into small tufts that fill points evenly. Finely snipped felt offcuts also work for a firmer, flatter result. Use only a little either way, so the blanket stitch is not stretched open.
Are felt ornaments suitable for young children to handle?
Treat them as decorations rather than toys. Sequins, buttons and ribbon loops are small parts and can come loose, so hang the ornaments out of reach of young children and pets. For a plainer version, leave off the sequins and buttons and decorate with stitching only.