Four Hand-Sewing Stitches for Handmade Gifts
Running stitch, backstitch, whipstitch and blanket stitch: what each one is for, how the thread travels, and how to start and finish so the stitching holds.
Tutorial at a glance
Materials
- Hand-sewing needle
- Sewing thread or six-strand embroidery floss
- Small sharp scissors
- Scrap of craft felt for practice
- Pencil and ruler
Four hand-sewing stitches cover almost every small fabric and felt gift on this site: running stitch, backstitch, whipstitch and blanket stitch. Each one does a different job. Two of them join or decorate flat layers, and two wrap around an edge to hold it closed.
None of them needs a sewing machine, a hoop or special thread. A needle with an eye large enough to thread comfortably, a pair of small scissors and a scrap of craft felt to practice on are enough. Work a short row of each stitch on the scrap before starting a gift, because spacing settles down after the first dozen stitches.
Thread Length, Single or Doubled
Cut thread about 18 in (45 cm) long, roughly the distance from your fingertips to your elbow. Longer thread looks efficient but twists, knots on itself and frays where it rubs through the fabric over and over.
Use the thread single (one tail short, one long, knot only the long end) for decorative stitching and for thin fabrics, where a fine line looks neater. Use it doubled (both ends knotted together) for seams that will be pulled on, such as a stuffed shape or a bag seam. Six-strand embroidery floss is a different case: separate it and sew with two or three strands for visible stitching on felt.
Starting and Ending Securely
A knot alone can pull through loosely woven fabric or soft felt. Start with a small knot at the end of the thread, bring the needle up from the wrong side, then take one tiny stitch on the spot before moving on. That extra stitch locks the knot in place.
To finish, take two tiny stitches on top of each other on the wrong side, pass the needle through the loop of the second one before pulling it tight, and trim the tail to about 1/4 in (6 mm). On two-layer felt projects, hide both the starting knot and the finishing stitches between the layers.
Tip
If the thread keeps twisting, let the needle dangle freely from the work every few stitches. The thread unwinds itself and tangles far less.
How the Four Stitches Are Formed
Every stitch is a path the thread takes above and below the fabric. Follow each path slowly once and the rhythm becomes easy to repeat.
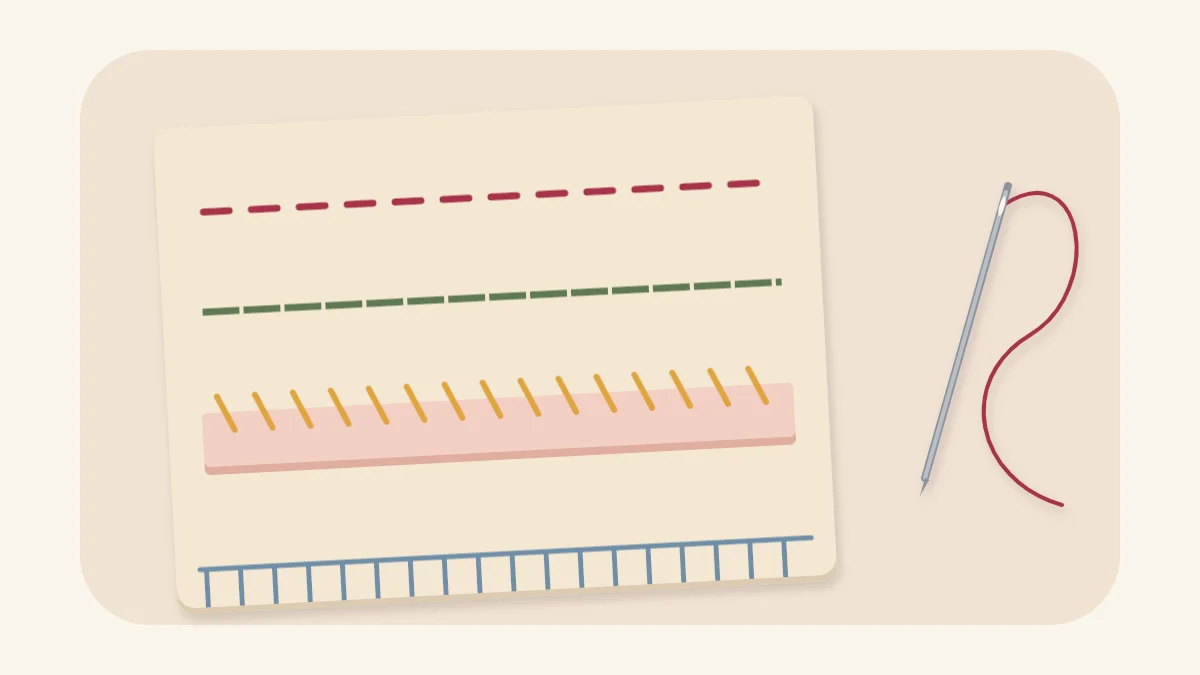
- Running stitch. Bring the needle up, go down a short distance ahead, come up the same distance further on, and repeat. The result is a dashed line with equal stitches and gaps, about 1/8 in (3 mm) each for small gifts. It is the fastest stitch to work and the weakest, because the layers can slide along the thread.
- Backstitch. Come up one stitch length ahead of where the last stitch ended, then go back down into the end of that last stitch. Each stitch travels backward on top and forward underneath, so the top shows a solid line with no gaps. The underside shows longer, overlapping stitches.
- Whipstitch. Hold two edges together. Push the needle through both layers from back to front, carry the thread over the edge, and push through from the back again a little further along. The thread forms a row of small slanted stitches wrapped over the edge.
- Blanket stitch. Work along an edge with the needle pointing toward you. Push the needle through the fabric about 1/8 in (3 mm) in from the edge, and before pulling tight, make sure the working thread lies behind the needle point. Pull up gently. Each stitch forms an L shape: one leg into the fabric, one leg lying along the edge.

Which Stitch to Use Where
Choose by what the stitch has to do: hold a seam that takes strain, close an edge, or simply decorate. The table lists the usual choice and a project on this site where each stitch does most of the work.
| Stitch | Best for | Where it is used |
|---|---|---|
| Running stitch | Light joins, gathering, decorative lines | The edge of a felt heart pocket |
| Backstitch | Strong seams and solid outlines | The spine of a felt needle book |
| Whipstitch | Closing two edges quickly, attaching appliqué | The edge of a stuffed felt keychain |
| Blanket stitch | A neat, decorative finish on felt edges | The two outer edges of a felt corner bookmark |
Backstitch is the one to reach for when a pattern assumes a machine seam on quilting cotton. It is slower than running stitch, but the seam does not gather up or gape when the piece is turned right side out and filled.
Ladder Stitch for Closing a Turning Gap
A fifth stitch is worth knowing for one job only: closing the turning gap on a piece that has been sewn right sides together and turned. Fold the seam allowance of both gap edges to the inside so they line up with the rest of the seam. Take a small stitch along the fold on one side, cross straight over, and take a small stitch along the fold on the other side.
The crossing threads look like the rungs of a ladder until you pull the thread snug. Then the two folds meet and the stitches disappear into the seam. Sachets and small pillows are usually closed this way.
Common Problems and How to Fix Them
- Puckered fabric. The thread is pulled too tight. Smooth the seam flat between your fingers after every few stitches and pull only until the thread lies on the surface.
- Uneven stitches. Mark a faint row of dots with a pencil and ruler on the first few projects. The eye learns the spacing quickly, and the marks sit under the thread.
- Blanket stitch legs leaning sideways. The needle is entering at a different depth each time. Keep every stitch the same distance from the edge, and tug each one straight up rather than along the seam.
- Thread pulling out of felt. The stitches are too close to the edge. Move in to at least 1/8 in (3 mm).
- Knots halfway along. The thread is too long or has twisted. Slip the needle into the loop of the knot and ease it open before it tightens.
Watch out
Count your needles and pins before and after sewing, and store them in a closed container. A needle left in a finished gift or on a sofa is a real hazard.
Practice Before the Real Piece
Cut a strip of craft felt about 2 x 6 in (5 x 15 cm) and fold it in half lengthwise. Work running stitch and backstitch through both layers down the middle, then whipstitch one short end and blanket stitch the long open edge. The sampler shows which stitch feels comfortable at which size, and it can stay in the sewing box as a reference for spacing.
Frequently asked questions
Which hand stitch is the strongest for seams?
Backstitch is the usual choice for a seam that takes strain, because every stitch overlaps the one before it and leaves no gaps on the top side. Running stitch is faster but lets the layers slide along the thread. For a stuffed shape or a bag seam, use backstitch with doubled thread.
Should the thread be single or doubled?
Use single thread for decorative lines and thin fabric, where a finer stitch looks neater. Use doubled thread, with both ends knotted together, for seams that will be pulled on. With six-strand embroidery floss, separate the strands and sew with two or three.
What is the difference between whipstitch and blanket stitch?
Both wrap over an edge to join two layers. Whipstitch is a simple slanted stitch over the edge and is quicker to work. Blanket stitch catches the working thread behind the needle, so each stitch forms an L shape with a line of thread running along the edge, which gives felt a more finished border.