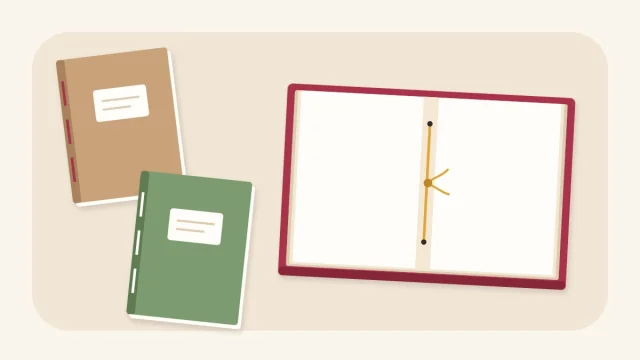
Accordion Photo Book: A Folded Paper Keepsake
Fold one long strip of heavy paper into equal panels, glue it between two paper-covered boards and add a ribbon tie to make a small photo book that stands open in a zigzag.

Tutorial at a glance
Materials
- Heavy drawing paper or light cardstock, cut to about 24 x 5 in (60 x 12.5 cm)
- Stiff cardboard for two cover boards
- Decorative paper for the covers
- Ribbon, about 24 in (60 cm)
- Glue stick or craft glue and a flat brush
- Photo-safe adhesive or photo corners
- Ruler, pencil and bone folder
- Scissors or a craft knife and cutting mat
An accordion photo book is one long strip of heavy paper folded back and forth into equal panels and capped with two stiff covers. Pulled open, it stands on a shelf in a zigzag and shows every photo at once. Closed, it is a small hardback tied shut with a ribbon. There is no sewing, only measuring, folding and gluing.
The version here has six panels, each about 4 x 5 in (10 x 12.5 cm). Two are glued to the covers, which leaves four free for photos. The same method stretches to eight or ten panels by joining two strips with a small tab.
What You Need
- Heavy drawing paper or light cardstock for the strip, stiff enough to stand but able to fold without cracking
- Stiff cardboard for two cover boards
- Decorative paper for the covers
- Ribbon, about 24 in (60 cm) long and no wider than 3/8 in (1 cm)
- A glue stick or craft glue and a flat brush
- Photo-safe adhesive or photo corners
- Ruler, pencil, bone folder, scissors or a craft knife and cutting mat
- Scrap paper and a heavy book for pressing
Most of this is part of the paper side of a basic kit for paper and fabric projects.
Plan the Number of Panels
Keep the number of panels even. With an even count, both end panels turn their backs outward when the strip is folded, so both covers glue to the same side of the paper and every photo panel faces the same way. An odd count leaves one cover attached to the wrong face.
| Panels | Strip length at 4 in (10 cm) per panel | Panels free for photos |
|---|---|---|
| 6 | 24 in (60 cm) | 4 |
| 8 | 32 in (80 cm) | 6 |
| 10 | 40 in (100 cm) | 8 |
The strip is 5 in (12.5 cm) tall in every case.
Fold the Strip into Equal Panels
- Cut the strip. For six panels, cut a strip about 24 x 5 in (60 x 12.5 cm). Measure the height at both ends: a strip that tapers folds into a stack that fans out.
- Mark the panels. Make a small pencil mark every 4 in (10 cm) along the top edge and again along the bottom edge. Marking both edges keeps the folds square.
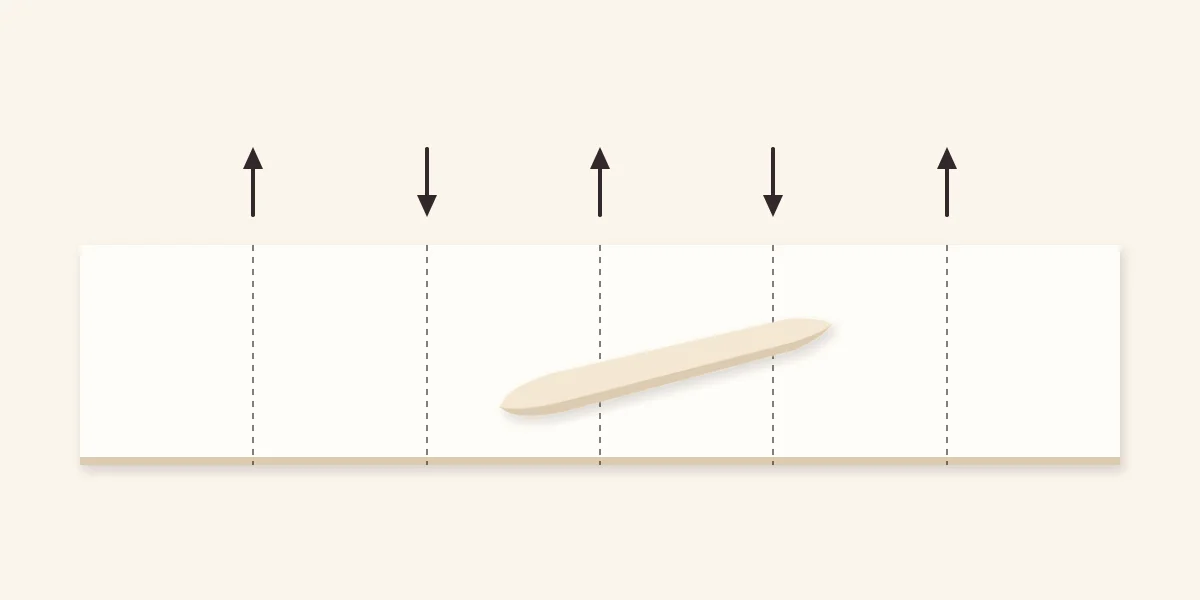
- Score each line. Lay the ruler across each pair of marks and draw the tip of the bone folder along it. Six panels need five score lines.
- Fold in alternating directions. Fold the first score toward you, the second away from you, and so on to the end. Sharpen each fold with the flat of the bone folder.
- Check the stack. Press the folded strip flat. If one panel sticks out, trim a sliver from it rather than refolding.
Join Two Strips for More Panels
When the paper is not long enough, cut two shorter strips with the same number of panels. Add an extra 1/2 in (1.2 cm) to the end of one, score it and fold it over as a tab. Glue the tab behind the first panel of the second strip, so the edge of that panel sits exactly on the tab’s fold. The join then hides inside a fold instead of crossing a panel. Press it under a book until the glue is dry, following the glue’s label.
Make the Covers and Attach the Ribbon
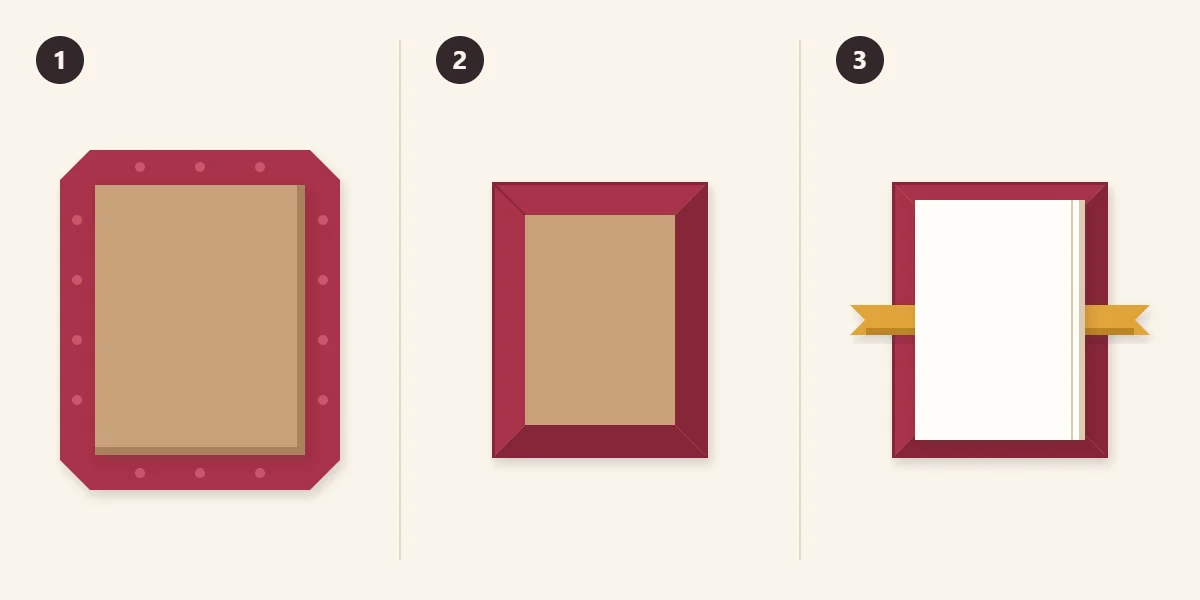
Cut two boards about 4 1/4 x 5 1/4 in (10.5 x 13 cm), slightly larger than a panel. Cut two pieces of decorative paper about 6 1/4 x 7 1/4 in (16 x 18.5 cm), which gives a 1 in (2.5 cm) margin on every side.
- Glue the board and trim the corners. Spread glue on one face of a board and set it in the center of the decorative paper, wrong side up. Cut across each corner of the paper diagonally, leaving a gap about as wide as the board is thick between the cut and the board’s corner. Without that gap the bare corner shows.
- Fold the edges over. Glue the two long margins and fold them tightly over the board, then the two short ones, tucking the paper in at each corner with the bone folder.
- Add the ribbon and the first panel. Lay the ribbon across the inside of the cover at mid-height with equal tails on both sides, and hold it with a dab of glue. Spread glue over the back of an end panel and press it onto the cover on top of the ribbon, with an even border all around.
Cover the second board the same way, without a ribbon. To attach it, fold the accordion closed on the first cover, spread glue on the end panel now facing up, and lower the second cover onto it so the two boards line up. Leave the book under a heavy book until the glue has dried as its label directs.
Tip
Use as little wet glue as possible on the covers. Thin paper soaked with glue stretches, then pulls the board into a curve as it dries. A glue stick, or craft glue brushed out thinly, keeps the boards flatter.
Mount the Photos and Write the Captions
Prints trimmed to about 3 x 4 in (7.5 x 10 cm) leave a 1/2 in (1.2 cm) margin on a panel, which keeps them clear of the folds. Fix them with an adhesive sold for photographs or with photo corners, and check the product label to confirm it is meant for photos. Corners hold a print without glue touching it. Mount copies rather than the only print of a picture.
Write captions before the photos go in: the place, date or names. Test the pen on a scrap of the same paper first to see whether it smears.
If Something Goes Wrong
- The closed stack is crooked. The panel marks drifted. Measure every mark from the same end of the strip.
- The folds crack. The paper is too heavy or was folded without scoring. Test a lighter paper on a scrap.
- A cover has warped. Too much wet glue. Press it under weight again.
Giving It
Wrap the ribbon tails around the closed book and tie them in a bow. Some panels can be left empty so photos can be added later. The book fits a tissue-lined box or a paper wrap, as described in how to wrap a handmade gift, and leftover cover paper makes a matching tag using the shape in personalized gift tags. For pages to write on instead of panels to display, see the hand-bound mini notebook.
Frequently asked questions
What paper works for an accordion photo book?
Heavy drawing paper or light cardstock works well: it needs to be stiff enough to stand in a zigzag but still fold cleanly once scored. Test a fold on a scrap first. If the fold cracks or looks rough, the paper is too heavy for this use or needs firmer scoring.
Why should the book have an even number of panels?
With an even number of panels, both end panels face outward on the same side of the strip when it is folded. That lets both covers glue to the back of the paper, so every photo panel faces the same way when the book is pulled open.
How should photos be attached to the panels?
Use an adhesive sold for photographs or paper photo corners, and check the product label to confirm it is intended for photos. Photo corners hold a print without glue touching it, so pictures can be swapped later. Mounting copies rather than the only print of a picture is a sensible precaution.