Hand-Bound Mini Notebook: A Pamphlet Stitch Paper Gift
Fold half sheets of US Letter paper inside a cardstock cover, pierce three holes along the fold and bind them with a three-hole pamphlet stitch.
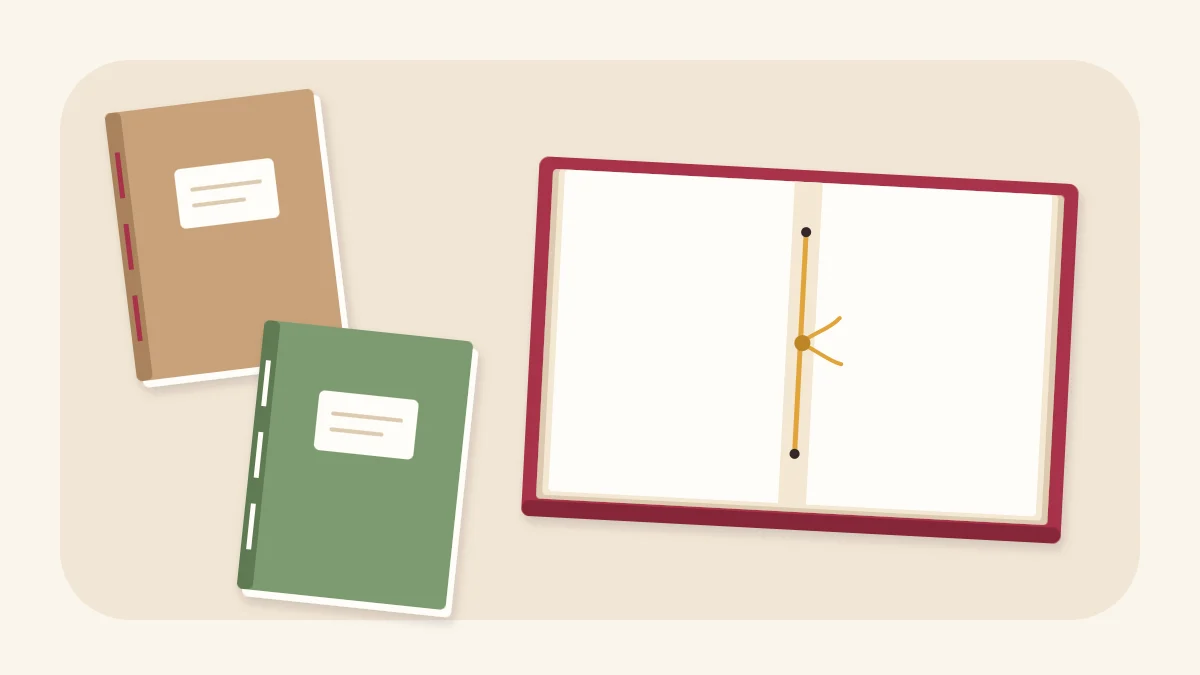
Tutorial at a glance
Materials
- Cardstock cover, 5.5 x 8.5 in (14 x 21.6 cm)
- Six to eight sheets of text-weight paper, 5.5 x 8.5 in (14 x 21.6 cm)
- Waxed thread or strong linen or buttonhole thread
- Sharp needle
- Awl or sturdy needle for piercing
- Bone folder, ruler and pencil
- Craft knife, metal ruler and cutting mat
- Two binder clips or paper clips
The pamphlet stitch is the simplest binding there is: one thread, three holes and a single knot hold a stack of folded pages inside a cover. A hand-bound mini notebook made this way needs no glue, and it opens flat because the pages are sewn through the fold.
The notebook here is pocket-sized, cut from US Letter paper. It suits someone who keeps lists or sketches small ideas.
What You Need
- One piece of cardstock for the cover, 5.5 x 8.5 in (14 x 21.6 cm), which is half a US Letter sheet
- Three or four US Letter sheets of text-weight paper, cut in half to give six to eight sheets of 5.5 x 8.5 in (14 x 21.6 cm)
- Waxed thread, or strong thread such as linen or buttonhole thread
- A sharp needle with an eye large enough for the thread
- An awl or a second, sturdier needle for piercing
- A bone folder, ruler, pencil and scissors
- A craft knife, metal ruler and cutting mat for trimming
- Two binder clips, and a folded towel to pierce into
Plain printer paper, lined paper or light drawing paper all work for the pages. Substitutes for a bone folder and other tools are listed in the guide to basic supplies for paper and fabric projects.
Sizes and Grain Direction
| Starting sheet | Cut size for cover and pages | Finished notebook |
|---|---|---|
| US Letter, cut in half | 5.5 x 8.5 in (14 x 21.6 cm) | 5.5 in tall x 4.25 in wide (14 x 10.8 cm) |
| A4, cut in half (A5) | 148 x 210 mm (about 5.8 x 8.3 in) | A6: 148 mm tall x 105 mm wide (about 5.8 x 4.1 in) |
Paper has a grain, which is simply the direction most of its fibers lie. To find it, curve a sheet one way, then the other, without creasing: the way that offers less resistance is along the grain.
A notebook behaves best when the fold runs along the grain. Paper folded against it tends to crack along the crease and spring open. This matters most for the cardstock cover, so test it before cutting.
Fold and Nest the Pages
- Fold each text sheet in half, short edge to short edge, to make a folded page 5.5 in tall and 4.25 in wide (14 x 10.8 cm). Line up the corners, then sharpen the fold with the bone folder.
- Slip the folded sheets one inside the other to form a single stack. Six sheets give 24 pages to write on; eight sheets give 32.
- Score the cover down the centre with the bone folder against a ruler, fold it, and wrap it around the stack.
- Tap the top edge on the table to level everything, then clip the cover and pages together on one side so nothing shifts.
Mark and Pierce the Three Holes
Pierce through the whole stack in one go so the holes line up, using a paper guide for the spacing.
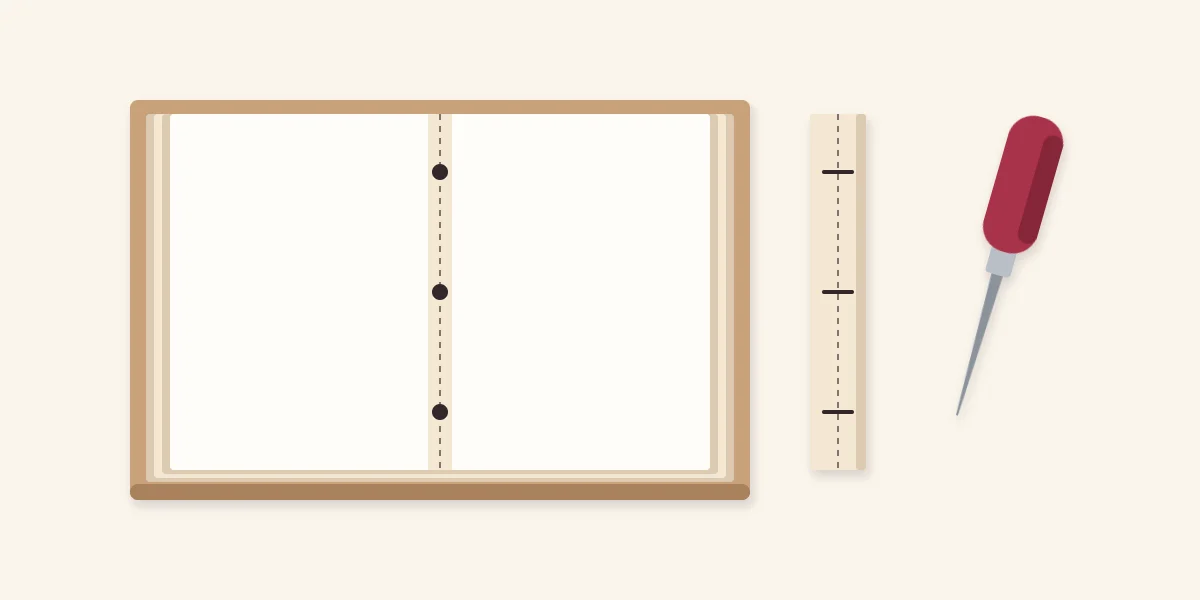
- Cut a strip of scrap paper exactly as tall as the notebook, 5.5 in (14 cm), and about 1 in (2.5 cm) wide. Fold it in half end to end and mark the fold: that is the centre hole. Mark two more points, each 1 in (2.5 cm) in from an end.
- Open the clipped notebook at the centre and lay it over the folded towel. Set the guide strip in the fold and copy its three marks onto the innermost page.
- Hold the notebook open at a right angle, like a V, and push the awl through each dot from the inside, straight through the fold of every sheet and the cover.
Watch out
An awl is sharp. Pierce down into the padding, never toward the hand that is holding the pages.
Sew the Three-Hole Pamphlet Stitch
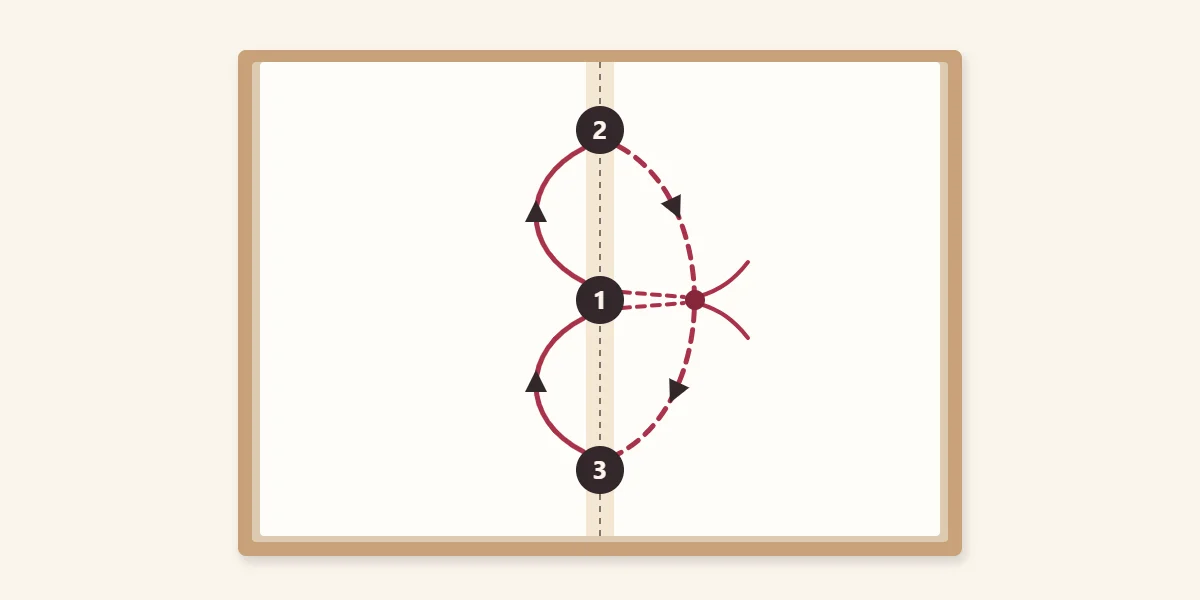
Cut a length of thread about three times the height of the spine, roughly 17 in (43 cm), and thread the needle without knotting the end. The centre hole is 1, the top hole 2 and the bottom hole 3. The path below starts on the outside of the spine, which leaves the knot there as a visible detail.
- From the outside, push the needle in through the centre hole (1). Pull the thread through until a tail of about 3 in (7.5 cm) is left hanging outside.
- On the inside, travel up the fold and push the needle out through the top hole (2).
- On the outside, carry the thread all the way down the spine, past the centre hole, and push the needle in through the bottom hole (3). This forms one long stitch along the back.
- On the inside, travel up the fold and push the needle out through the centre hole (1) again. Bring the needle out on the opposite side of the long stitch from the starting tail.
- Pull both ends gently until the stitches lie snug. Tie the two tails in a square knot around the long stitch and trim them to about 1/2 in (1.2 cm).
For a knot hidden inside the notebook, start from the inside at the centre hole and follow the same order, so the long stitch and the knot end up in the centre fold. Either way, tighten by pulling the thread parallel to the spine; pulling straight outward can tear the paper between the holes.
Trim the Fore Edge
When sheets are nested, the inner ones are pushed outward, so the edge opposite the spine, called the fore edge, ends up stepped. You can leave it as it is. For a flush edge, close the notebook on the cutting mat, lay a metal ruler just inside the shortest page, press down firmly and draw the craft knife along it in several light passes. Keep fingers behind the ruler’s edge.
If Something Goes Wrong
- The pages feel loose. The thread was not tightened before knotting. Untie, pull snug along the spine and retie.
- Holes sit beside the fold. The notebook was pierced lying flat. Re-pierce it held open at a right angle.
- The cover cracks on the fold. The fold runs across the grain or was not scored. Score first, and cut the next cover the other way.
Giving It
A cover can be left plain or finished with a stamped motif or a strip of patterned paper, added before sewing while it lies flat. Three notebooks in different cover colors, held with a paper band, make a set. The notebook pairs with a handmade stationery set, and the folding skills carry over to an accordion photo book.
Pack notebooks flat in a box or a rigid envelope. Suggestions for boxes, bands and tags are in the guide on how to wrap a handmade gift.
Frequently asked questions
How many pages can a pamphlet stitch notebook hold?
Six to eight folded sheets of text-weight paper is a comfortable range, giving 24 to 32 pages. Beyond that the stack becomes hard to pierce cleanly, the inner pages stick out farther at the fore edge and the notebook does not close flat. For more pages, use thinner paper or make two notebooks.
What thread should be used for a pamphlet stitch?
Waxed thread is the usual choice because it grips and holds a knot. Strong unwaxed thread such as linen or buttonhole thread also works, as does doubled embroidery floss for a light notebook. Ordinary sewing thread is thin and can cut into the paper, so double it if it is all you have.
Should the knot be inside or outside the notebook?
Either is correct. Starting from the outside leaves the knot and the long stitch on the spine as a decorative detail; starting from the inside hides both in the centre fold. The order of the holes is the same in both versions: centre, top, bottom, centre.