Felt Heart Pocket: A Valentine’s Day Gift That Holds a Note
Two felt hearts stitched together around the lower edge form an open-topped pocket for a folded handwritten note or a small card.

Tutorial at a glance
Materials
- Craft felt in a main color, about 5 x 10 in (12.5 x 25 cm)
- Scrap of contrasting felt
- Paper and pencil for the template
- Small sharp scissors
- Pins
- Six-strand embroidery floss
- Embroidery needle
- Optional narrow ribbon, about 8 in (20 cm)
- Paper or cardstock for the note
Stitch two felt hearts together around the lower edge only and the result is a felt heart pocket: a flat pouch, open at the top, that holds a folded handwritten note or a small card. It is a Valentine’s Day project with very little sewing, one line of running stitch and a small appliqué, and it can hang from a ribbon or lie flat in an envelope.
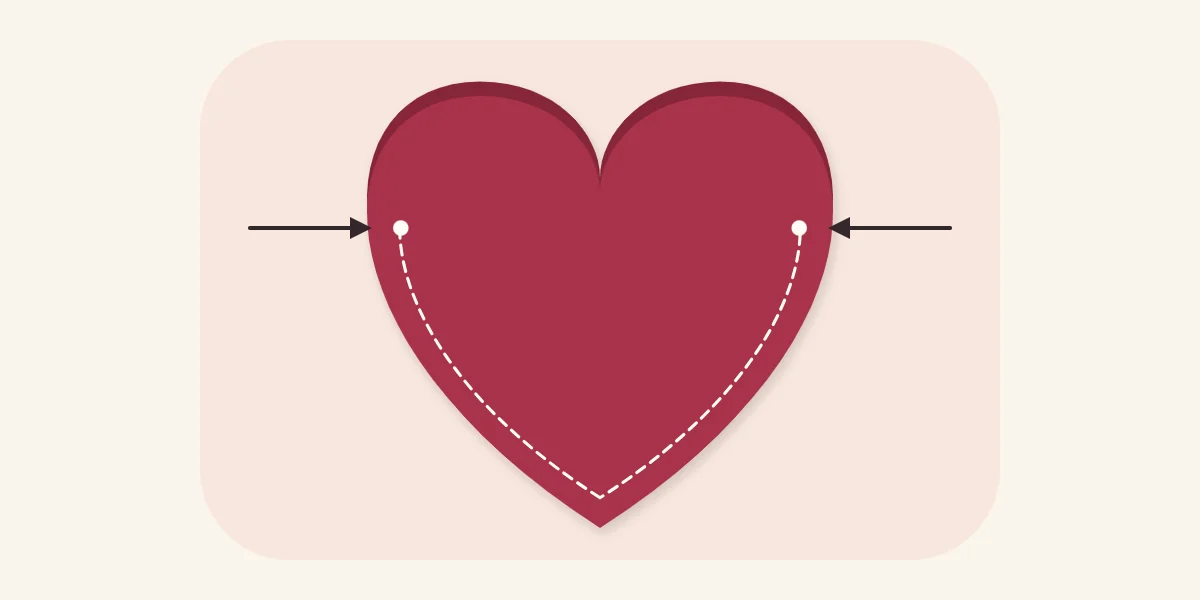
The only decision that affects whether it works is where the stitching starts and stops. Stop too low and the note falls out sideways; go too high and the opening is too narrow to slide anything in.
What You Need
- Craft felt in a main color, about 5 x 10 in (12.5 x 25 cm), and a scrap in a contrasting color
- Paper, a pencil and paper scissors for the template
- Small sharp scissors for the felt, and two or three pins
- Six-strand embroidery floss and a needle with an eye large enough for it
- Optional: narrow ribbon, about 8 in (20 cm), for a hanger
- Paper or cardstock for the note
Cutting the Hearts from a Folded Template
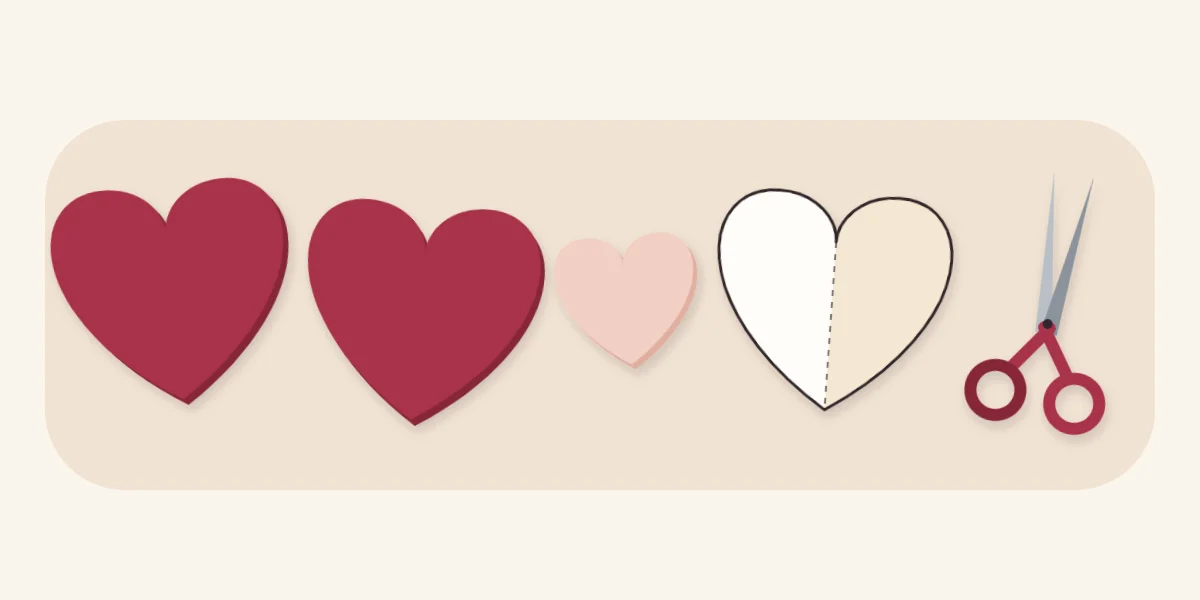
Fold a piece of paper in half and draw half a heart against the fold, 4 in (10 cm) tall. Aim for full, rounded lobes and a point that is not too sharp, since a very narrow point is hard to stitch around. Cut through both layers and unfold. The fold guarantees that both sides match.
Pin the template to a double layer of the main felt and cut two hearts at once. Then fold the template again, trim it down to about 1 1/2 in (4 cm) tall, and cut one small heart from the contrasting felt. Felt does not fray, so no edge needs hemming.
Sizes for the Pocket and the Note
The note has to be narrower than the heart at its widest point, with room for the stitching on each side. The table gives sizes that fit together.
| Version | Heart height | Appliqué heart | Folded note, no wider than |
|---|---|---|---|
| Mini | 2 1/2 in (6.5 cm) | 1 in (2.5 cm) | 1 1/2 in (4 cm) |
| Standard | 4 in (10 cm) | 1 1/2 in (4 cm) | 2 1/2 in (6.5 cm) |
| Large | 5 in (12.5 cm) | 2 in (5 cm) | 3 1/4 in (8 cm) |
Sewing the Pocket
Use two or three strands of floss in a color that contrasts with the felt, so the stitching reads as decoration. The guide to four hand-sewing stitches explains running stitch, whipstitch and how to fasten off.
- Appliqué the front. Pin the small heart to the centre of one large heart. Sew it on with small whipstitches over its edge or a line of running stitch just inside it. Fasten off on the back. This must happen before the two large hearts are joined, or the stitches would close the pocket.
- Add the hanger, if you want one. Fold the ribbon in half. Lay its two ends side by side on the wrong side of the back heart, at the dip between the lobes, about 1/2 in (1.2 cm) down. Hold them with a few small stitches that go through the ribbon and the back heart only.
- Stack and pin. Place the front heart on the back heart, wrong sides together, with all edges matching. Pin through the centre.
- Find the start and stop points. Locate the widest point of the heart on each side. On a 4 in (10 cm) heart this is roughly one-third of the way down from the top. Mark both with a pin.
- Stitch the lower edge. Hide the knot between the layers at the first pin. Work running stitch about 1/8 in (3 mm) from the edge, down that side, around the point and up to the second pin. Keep stitches and gaps the same length, about 1/8 in (3 mm).
- Reinforce both ends. At the start and the stop, take two stitches on top of each other over the edge. These two spots take the strain every time a note is pushed in. Fasten off between the layers.
The top lobes of both hearts stay unstitched. Pressed lightly apart, they form the mouth of the pocket.
Tip
Fold and cut the note before sewing, then use it to test the opening when the stitching reaches the second pin. It is easier to stop one stitch early than to unpick.
The Note Inside
Cut a strip of paper or thin cardstock to the width in the table and fold it once or twice so that about 1/2 in (1.2 cm) shows above the felt. Write the message before folding. A plain strip can be turned into a small card by rounding the top corners. Keep the contents to paper: the pocket is open at the top and is not meant for food or for heavy objects.
Variations
- Initial appliqué. Replace the small heart with a felt initial cut freehand in simple block form, about 1 1/2 in (4 cm) tall. Check the letter before cutting.
- Mini pocket garland. Make five or seven mini pockets, each with a short ribbon loop, and thread them onto twine. Stringing and spacing work the same way as on a felt leaf garland. Each pocket can hold a small paper slip.
- Blanket stitch edge. Swap the running stitch for blanket stitch around the lower edge for a firmer border, as used on a felt corner bookmark.
- Two-tone hearts. Cut the front and back from different colors so the back shows as a rim when the lobes are opened.
If Something Goes Wrong
- The note slips out at the side. The stitching stops below the widest point. Add a few stitches upward on each side.
- The opening is too tight. Unpick two stitches at each end and reinforce again, or trim the note narrower.
- The edges do not match. The hearts were cut separately or shifted. Trim both layers together after pinning.
- The felt puckers. The thread was pulled too tight. Stroke the seam flat between finger and thumb to ease the stitches before fastening off.
Giving It
Slide the note in so its top edge shows, and lay the pocket flat in an envelope or a small box so the lobes are not creased. The hanger lets it go on a door handle, a drawer knob or a hook. A handmade cardstock gift tag can carry the name if the note inside is meant to stay hidden.
Watch out
Keep needles and pins counted while you work, and check the finished pocket for a stray pin before the note goes in.
Frequently asked questions
Where should the stitching stop on a felt heart pocket?
Start and stop at the widest point of the heart on each side, which on a 4 in (10 cm) heart is roughly one-third of the way down from the top. Stitching lower lets the note slip out sideways, and stitching higher makes the opening too narrow. Reinforce both end points with two stitches over the edge.
What size note fits a 4 in felt heart pocket?
A note folded to no more than about 2 1/2 in (6.5 cm) wide fits between the two lines of stitching. Fold it so about 1/2 in (1.2 cm) shows above the felt, which makes it easy to pull out. Cut the note first and use it to test the opening while sewing.
Can the heart pocket be made without the ribbon hanger?
Yes. The hanger is optional and is stitched only to the back heart before the layers are joined, so leaving it off changes nothing else. Without it, the pocket lies flat and fits in an ordinary envelope.